The Benefits of Recording Your 35mm Slide’s Exposure Number

Did you ever notice those little 2-digit numbers printed at the top of your 35mm slides?
I have to keep in mind some of you reading this may have never even touched a roll of film in your life!
It’s scary for guys like me to think that’s even possible, but it really is!
Digital cameras have been affordable since about 2000.
For the uninitiated, [cough] when you shot pictures that would be developed as those little plastic or cardboard slides that you later projected onto a large screen for family nap times viewings, you used a special roll of film in your camera.
One of the choices you had to make when picking out a box of film was how many exposures you wanted.
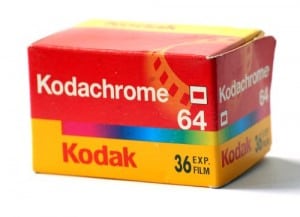
Usually, they came in divisibles of 12 — so 12, 24, or 36 images (or exposures) were most popular.
Isn’t it funny to think that back then we were actually “limited” to the number of shots we could take!
Okay, so now we are back to those funny little numbers that are usually printed somewhere on your old slides.
Yes! Thanks for keeping up. These numbers represent what frame from the roll of film is inside this slide mount.

Now, this number could seemingly be irrelevant to many now that we are moving along in the digital era.
But, I am proposing to you now to consider recording this exposure number somewhere in your “digital” records for one of many possible reasons that could eventually come up for you.
Now, if you are using any of the other techniques I revealed in my file naming system and numbering system, you may be a little upset with me for suggesting yet another thing to keep track of. [laughing] I’m Sorry!
But even though this would benefit anyone who is scanning their 35mm slides, it’s possible this is more of a suggestion for those with advanced goals for their photo collections.
Why Even Record This Info
The main reason to type this information somewhere in your records is because of chronology.
We all rely on this kind of time-based order more than we’re probably really aware of.
For example, if someone asks us how our vacation or holiday was, what do we do? We show them our photo collections on our laptops or smartphones and we say something like:
It was incredible! First we did this, and then we did that, and here we are eating this — oh and THEN you won’t believe what we saw!
The chronology of the images is important because it reveals the experience as an entire story. Otherwise, it just becomes a bunch of single random memories.
We are all spoiled in the digital camera age when all of our photos are automatically “date stamped” for us. When we want to know when a photo was taken, we just “right click” on it and look at the properties or information window, and we can find out the exact date and time it was taken. It’s fantastic!
Better yet, if you want to sort a whole group of digital images in the order they were originally taken, it’s usually just clicking one button or “heading bar” at the top of the list, and boom, they are sorted in order!
But, if you’re holding a physical slide in your hand, all you have to go on is that exposure count and (if you’re lucky) part of the date when it was developed stamped at the top to help you determine when the photo was taken.
And don’t get me started on sorting a group of slides by chronological order in your image manager software. Without knowing the exposure number, you are pretty much completely out of luck unless you were actually there when the photos were taken, and your memory is remarkable!
It may take some work moving the images around in your image manager, but with these numbers recorded, you will eventually be able to put unsorted slides back into their original chronological order.
When Should You Record It
The best time to record this number is right after you’ve scanned them or gotten them back from a photo scanning service.
Chances are, once you put them back in their little boxes, slide trays, or whatever you have them stored in, and then put them back way in the dark place of your bedroom closet or whatever, I can almost guarantee you will never want to obtain this information.
I am right aren’t I?
This is especially true for those of you who are thinking about throwing your original slides and prints in the trash after you have scanned them. For the very small percentage of you who are working towards this “minimalistic” goal, recording this information as soon as possible is imperative.
How You Might Choose to Record It
Keep in mind we are in the process of moving our analog collections into the digital world. So, while recording this information in a paper log somewhere is, of course, possible, I would highly recommend you type this information into your computer in an appropriate place that will be associated with each particular image.
Filename
My favorite place to enter the exposure number is in the image’s actual filename.
I type it in right after I pull the slides out from my scanner. They are right in front of me on my desk so why not.
And if I need to, I can easily double-check and compare the slide to the digital file that was just created (by holding the slide up to a source of light) just to make sure I’m labeling the correct image.
If your operating system allows characters like parenthesis and brackets, I recommend you try using them around the number because they can differentiate the numbers and make them so much easier to read.
Here is a basic and an advanced example of how you could add them to your filenames:
Grandpa Holding Up Leaning Tower Pisa (24).jpg
1962-07-xx Leaning Tower Pisa (ES-3200-UM-48b-#01390) [SL-24].tif
In the advanced filename, I added “SL” for slide. This could help you quickly identify this image later as being made from a slide versus a negative (NG) or a print (PR).
Description / Caption Field
Another place you could enter the number is in the caption or description field in your non-destructive image manager of choice.
To me, this isn’t as favorable as the filename. But, it’s an option nonetheless.
And for example, for those using iPhoto and who have already imported in their photos, modifying the description field is far easier than modifying the filename at this point.


Just know that in some applications, the caption may not be immediately written (saved) inside of the master image file. It’s possible it will just be stored in the software’s database until the image is eventually exported out of the program for various purposes.
Regardless, the number is still being stored with each digital image, and that is our goal. Just make sure your library (database) is being backed up regularly.
Metadata Fields
For those using more professional programs like Lightroom or Aperture, you could easily pull up the standardized IPTC fields where you can freely enter in any information you would like.
There isn’t a specific IPTC field called “Exposure,” but you could use one of the more generic fields like “Category” and place your exposure numbers there.

Or, you could create your own customized metadata field. Here in Apple’s Aperture, I created a “custom” metadata field and was able to label it “Exposure.”

Update: As pointed out by Art Taylor in the comments, calling the metadata field “Exposure” might be confusing as you might later think it’s referring to shutter speed, Aperture, and ISO/ASA. His suggestion of “Exposure Number” or “Frame Number” would be better, especially if you’re mixing it with other (EXIF) camera fields.
A downside, though, to custom fields as opposed to the standardized “IPTC” fields is that they may not carry over to other photo applications you may wish to use. I would advise you to experiment with this if your workflow involves moving from one application to another.
Okay, so who’s with me!? Who else is recording this information or is now thinking about doing so?
Tell me why in the comments below. I would love to hear your thoughts!