His Journey to Scan 1,978 Photos Began By Just Taking the First Step
A success story from a Scan Your Entire Life reader who offered to share with us his experience and workflow scanning and labeling his personal photo collection.
It can be done. I know because I've done it. Anyone could be forgiven for feeling intimidated when confronted by the prospect of digitising an accumulation of multiple lifetimes' worth of prints, negatives and slides. However, I recently successfully completed a project to digitise nearly two thousand items despite working a demanding full-time job. In this article we'll look at why I did it, how I did it and how you can do it too.
Why Did I Want to Digitise My Photos?
Why? If you are on this website then you probably have your own reasons. My primary motivation was simple: I wanted to look at them.
In recent years I have set up digital photo frames in the three places I spent most of my time: office, study and kitchen. Therefore I am likely to see any given digital or digitised picture in my collection of 25,000 at least once every few weeks. This is far better than keeping them in a shoebox, knowing that I can look at them whenever I like but never doing so. The chances of viewing old slides is very low and as for negatives… if you want to look at your old photos then scanning them and investing in one or more digital photo frames is the way to go.
There are more good reasons to Scan Your Entire Life. Preservation is an important one. Prints deteriorate with age whereas digitised images do not decline in quality as they sit on your hard drive or in the cloud. By scanning your prints you can stop deterioration in its tracks.
Another motivation is sharing. Duplicating a print has always been possible, but not especially easy or cheap. With your photographs in digital form it becomes straightforward to share them by the thousand. The number of people interested in your prints may be small, but those who do care are likely to care a great deal. A digital photoframe filled with family photographs could easily become a great source of joy and comfort for an elderly relative.
Another benefit of digitisation only revealed itself to me when I was well into the digitisation project. A print from the 1970s might be just three inches square, but once digitised the only limit to size is the size of your monitor. With 6o-inch TVs capable of displaying digital images commonplace, digitisation gives you the opportunity not just to view your old photos but to view them at poster size. This greatly increases their impact. Technology enthusiasts may also delight in the fact that digital images (scanned or from a digital camera) are one of the few native 4k sources out there.
Sharing and enlarging come together in the world of self-published photo books. Services such as Blurb enable you to produce high-quality coffee-table books of your photographs. A selection of two hundred favourite old photographs bound into a hardback book at 12″x12″ is a joy to behold.
Is The Game Worth The Candle?
Like most people, I do not have copious amounts of spare time. Was it really worth spending hundreds of hours scanning, sorting and captioning my photographs? In this world of ever-accelerating novelty and gadgetry, it can be difficult to distinguish between the things we want and the things we like. Would a cache of digitised old photos be a nine-day wonder, a huge investment of time for an idea that was appealing but not enjoyable?
Thankfully, I didn't just want my digitised prints, I like them too. I garner a great deal of pleasure from viewing them and my wife and I often discuss them when they appear on the digital photo frames. Indeed, I have gained more satisfaction from this scanning project than from the travel book I finished writing a few months earlier.
What I Used
Some readers will no doubt be curious to learn what equipment I used to propel myself towards scanning success. I'll cut to the chase immediately:
Hardware:
- Epson Perfection V500 Photo scanner
- Lenovo Thinkstation E31 desktop PC
- Three large LCD monitors
Software:
- Microsoft Windows 7
- Epson Scan (scanning software included with scanner)
- IrfanView — image viewing and editing software (free)
I don't use any photograph management software packages; I am quite content to use the Windows folder hierarchy as a means of categorising images. You may prefer to use one of the many packages out there but don't let an unwillingness to get to grips with a new software package put you off Scanning Your Entire Life: dragging and dropping between folders is good enough. Indeed, this simple method saves you from needing to worry about software version updates or switching between PC and Mac.
One non-essential tool I would like to call out though is the free (and simple) “Awesome Duplicate Finder“. This scans your image collection and points out pairs of images that look similar to one another. Unless you have a tiny collection, there is a good chance that some duplicates have crept in. This tool, or one like it, is the way to find them. Doing so manually is practically impossible.
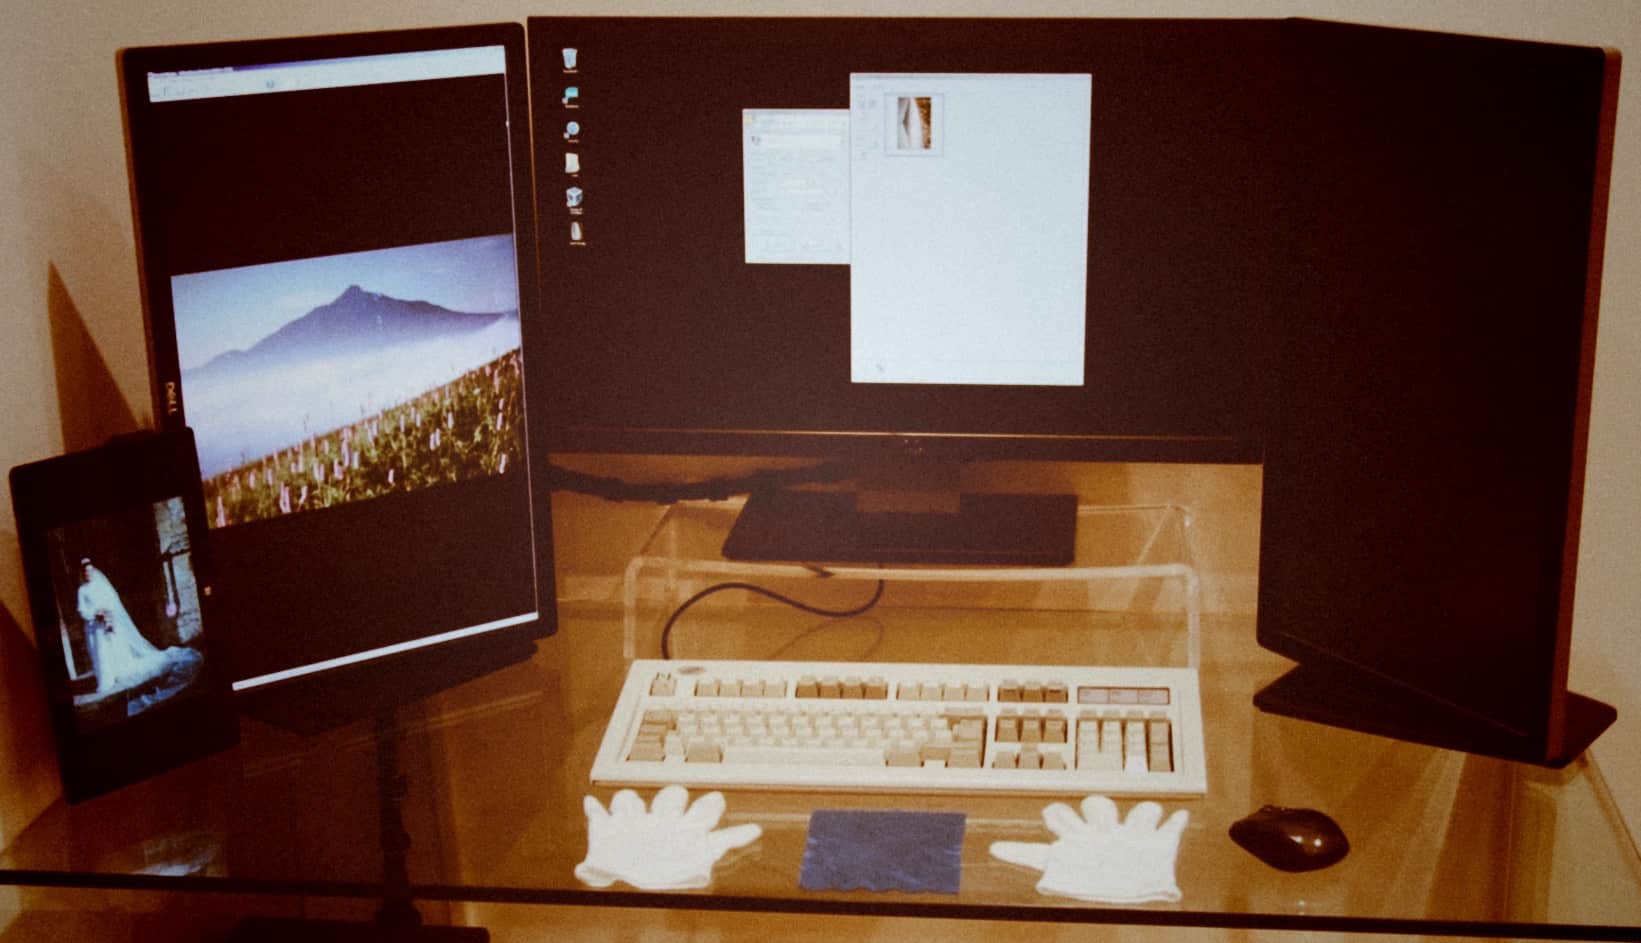
The photo below shows my scanning workstation. The digital photo frame on the left runs on a Microsoft Surface Pro PC. It is displaying a scan of a wedding photograph taken in 1970. The gloves are used for handling prints and the cloth for wiping the scan bed. I keep clutter to a minimum to avoid distractions.

The Great and the Good
The truth of the matter is that the equipment and software you use matters little provided you are comfortable with it. It is natural to fret over specifications when choosing scanning equipment: should you pay extra for a 9600dpi scanner instead of a 4800dpi model? Fret no longer. Unless you have some specialised requirements, any scanner and PC manufactured in the past decade will be fit for purpose. The resolution of a typical consumer scanner will be far greater than the information available from a typical photographic print. I recently downgraded my scanner to an Epson V39 to save space. I have not noticed the slightest degradation in quality compared to the Epson V500.
More generally, when Scanning Your Entire Life, it's worth remembering the aphorism “The Great is the enemy of the Good“. Far better to make some compromises and get less-than-perfect results than to dither about minor details and get little or nothing done.
I do have two recommendations on equipment though. The first is to keep an eye on disk space: 1,000 high-resolution scans could easily occupy 10GB. If you are scanning a huge collection onto an old netbook or a 128GB MacBook Air then you could find yourself running low on space.
Secondly, steer clear of mechanical feeders for scanners. These might be fine for paper documents, but when I tried one on some photographs, the mechanism quickly jammed and damaged my prints. I would not risk trying one again.
Finally, make sure you have a solid backup system in place. Hard drives can and do fail. Losing hundreds of hours of work would be disappointing to say the least. For backups I use Microsoft's aging SyncToy package to copy files to an external hard drive and Crashplan's soon-to-be-discontinued cloud backup service. A web search will reveal current solutions. (Curtis recommends BackBlaze)
Phone a Friend
Here I must make a confession. I only scanned about 100 of my prints myself. The rest I had scanned professionally. One batch I paid a freelancing friend to do. Said friend soon found full-time employment, so the second batch I sent to a British scanning service called Mr Scan (I live across the pond). I chose Mr Scan after evaluating a few services by getting each one to scan the same sample prints and comparing the results. I was surprised by how different these results were and it was easy for me to choose the service I wanted to use. (Curtis recommends ScanCafe)
If you can afford it and can bear to entrust your precious photographs to someone else, then I strongly recommend this approach. In my case, it gave me the kick-start I had needed for several years to knuckle down to the task of sorting and captioning. Indeed, once I had the scanned images in hand it was quickly apparent that the job had only just got started.
Nevertheless, I can report with confidence that it is possible for even the technologically challenged to scan their own photographs. Despite being partially sighted, as a massive retirement project, my mother personally scanned the bulk of our family photos, made up of several thousand prints, slides and negatives. She then assembled the resulting digital images into a library of hardback photo books printed by Blurb, and is immensely proud of the result.

Skills of the Ancients
Once I had my scanned images in hand, the work started. I immediately noticed that Mr Scan had not straightened the scans they had sent me, so I had a thousand images to straighten and crop. (My freelancing friend had done a much better job here). Of course, doing this for one image in IrfanView is easy. However, the job defied automation and was too big to tackle all in one go. What to do?
It was immediately apparent that my strong background in computing was going to be of little help with this undertaking. Yes, I can look at the Advanced Settings in Epson Scan without fear, but this offers scant consolation when faced with a huge task. Technophobes can take heart from the fact that technical skills are not where the real challenges of Scanning Your Entire Life lie. The real challenges are those of any large project: organisation, motivation, persistence, focus and determination. These skills have been around since the dawn of history: an Egyptian scribe would have needed them to organise a library of papyrus scrolls.
Pick Off The Weaklings
One well-known tip for dealing with a large project is to pick off the easy bits of the task first. Scanning photographs is well suited to this approach. Start by attacking small sets of prints that look like they will be easy to identify and do not need much cleaning up. You'll be able to say to yourself, “I've done all the Polaroids” or “I've done all the slides”. Gifting yourself these smaller targets near the start of the project will help motivate you to continue and will leave you with fewer (but larger) chunks of work later on.
Another thing to consider near the start of your project to Scan Your Entire Life is that you will get better at scanning, cleaning up, categorising and labelling as time goes on. Therefore it's a good idea to scan a few hundred less important items to get to grips with the technology before you embark on those precious wedding photos.
Combining these two points, awkward items such as super-wide-angle school photographs are best left until well into the project. I found that tackling a tricky item made a good but productive break from humdrum work.
Categorisation
An important weapon in your armoury is “Divide and Conquer”. Rather than focus on the end goal, set yourself sub-targets: the next 100 photos, get 25% of the way through, finish all the monochrome prints, indeed any milestone that feels achievable in the short term.
Fortunately, photo scanning naturally lends itself to subdivisions because sorting your scans into categories is an important part of the task. There are two tips on photo categorisation that I'd like to share.
The first is that you should expect to refine your categorisations as you go along; don't expect to get everything right on the first attempt. I was surprised by how often I found that I'd misidentified a picture after studying a few others. This phenomenon should be viewed as a positive result of studying the photographs: as you identify some you are learning about others.
In addition to refining your categorisations in terms of accuracy, it is worth looking out for ways in which categories can be divided into smaller sub-categories, for example from “Sports” to “Baseball”, “Soccer” and “Basketball”. I was surprised by just how few pictures ended up in the Miscellaneous category – and when you have a bunch of miscellaneous pictures they themselves may present a new category or two.
Secondly, on a more practical note, try to be a bit of a detective when categorising pictures. As well as the content of the picture itself, other characteristics of a print may identify it as belonging with others. For example, its size, how much it has faded, whether it has a border, even the texture of its surface. My favourite discovery was that some photos have data (and sometimes even a date) printed on the back; this can be a great help in identifying photos as belonging together.
To give you an idea of the sort of categorisation that can be used successfully in practice, I use two levels of hierarchy and categories that contain between a handful of images and a hundred or so.
For example:
People 1969_Parents_wedding
Consumer Grandads_car
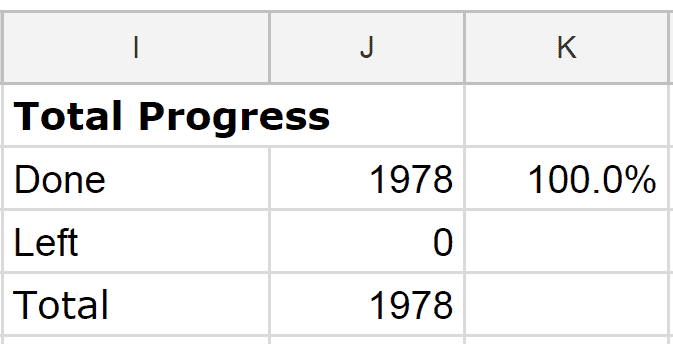
As I worked through my scans I updated a spreadsheet to track my overall progress as well as the categories I had completed. Viewing it and using it to mark milestones as I went along helped keep me motivated:
Another key motivator was this website, “Scan Your Entire Life”. When I found my enthusiasm flagging, reading a couple of articles on Curtis' website perked me up and made me appreciate that others were tackling far larger collections that mine. The inspiration was at least as important as the technical information.
My last 100 or so scans were the most challenging to sort and caption. To get myself over the finishing line I resorted to that most excellent of motivators: chocolate. One square of quality dark chocolate per scan gave me the theobromine hit I needed to embark on the next. Of course, it's not a good idea to do this when you still have hundreds or thousands of prints left to do.
Sort The Prints Or The Scans?
A debate covered in this post is whether it is better to sort your prints into categories before you scan them or after. My experience is that you should sort the scans, not the prints. However, it is wise to make maximum use of any ordering or categorisation that already exists in the prints. I base this on my experience: half of the photos that I processed were in a disordered mess, the other half were meticulously ordered and categorised.
It was easier to sort the disordered mess into categories on the computer, although it was essential to have access to the original prints to look for clues. Similarly, I still needed to do computer-based sorting work on the well-organised prints, not least because the scanning service only partially preserved their order. Fortunately I had numbered the photos on their backs, being careful to use a pen that would not damage the prints. If you have prints that are stored in order I recommend that you number them before scanning; in the heat of the scanning battle it would be easy to lose track of the ordering information.
Conventional Dating
As well as categorising images you may well want to date them. Doing so can make you think about the photograph in more depth and give you a better appreciation of it and how it fits into the wider context of your life and the lives of those close to you. Attempting to date a photo makes you think about it, and thinking about your photographs is one of the reasons for undertaking to Scan Your Entire Life.
This naturally leads on to the question of how to store the date for the image. I recommend doing so as part of your naming convention for the scans. The most important thing about a naming convention is that you have one and that you stick to it; the details of what that convention is are less important. Consistent and clear naming makes organisation easier: “Form is liberating” as they say. If you are looking for inspiration then the format I use is as follows:
[Date in Year-Month-Date format]_[Time in Hour-Minute-Second format]_[Description].JPG
For example:
1979-06-07_16-00-00_Freds_birthday.JPG
Note that I eschew spaces and apostrophes. I prefer to stick to a limited character range out of a (perhaps unwarranted) fear of upsetting the operating system. However, in truth, you are pretty safe using just about any characters. The beauty of this naming convention is that if you tell your operating system to list your image files alphanumerically within their folder then you automatically get to see them in chronological order.
Of course, when scanning prints you probably don't know the exact time the photograph was taken. Nevertheless, it's sometimes helpful to guess approximate timestamps a few moments apart to provide a narrative.
For example:
1979-06-07_16-10-00_Freds_birthday_cake_arrives.JPG
1979-06-07_16-11-00_Lighting_the_candles.JPG
1979-06-07_16-12-00_Fred_blows_out_the_candles.JPG
1979-06-07_16-13-00_Cutting_the_cake.JPG
1979-06-07_16-14-00_Fred_takes_his_first_bite.JPG
In the majority of cases where you don't know the exact time you can omit it and still benefit from the advantages of alphanumeric-chronological ordering:
1979-06-07_Freds_birthday.JPG
The benefit remains even if you don't know the date or even month. The season of the year is often a helpful indication of month for outdoor photos, and holiday decorations can help date indoor ones:
1979-06_Fred.JPG
1979_Fred.JPG
It can also be helpful to put dates on category folders, as you may have noticed in the examples above.
I was lucky enough to have some prints with the date burned on to them.

Finally, if you find yourself getting bogged down with your naming convention and using it is jeopardising your chances of getting your photos scanned in then relax your standards. Lots of badly-organised scans are likely to bring you more joy than a few well-labelled ones.
Geo-Tagging Bragging
Digital photographs taken using a smartphone or certain digital cameras often tag the image with the GPS coordinates of the location where the photograph was taken. This is known as geo-tagging.
Many of the photographs I scanned were from travels I made in the early 1990s and so their location was a matter of interest to me. Therefore I undertook to manually geo-tag my scans. I did this by using Google Maps to determine the latitude and longitude of each picture. I put this information into a separate text file. A more mainstream method would be to add the information to the photograph's metadata using an Exif editor.
This geo-tagging was immensely time consuming, mainly because of the time it took to work out the location of each picture. I estimate that I spent an average of five minutes on each of my scans, and much of this was down to working out their locations. As such, I would not recommend it to any but the most dedicated Scanners of Entire Lives.
However, I personally found it to be a worthwhile undertaking. In the course of my location research I learned a great deal. For example, I located the church where my parents in law held their wedding ceremony in 1970. A direct consequence of this was that my wife and I took a family history trip to explore the area where my dear departed mother-in-law grew up.
Tips for Scanning
Fingerprints and dust look bad on scans. When scanning I wear white cotton gloves to keep fingerprints off the prints and the glass. I also wipe the scan bed with a lens cloth before each scan. Use the edge of the scan bed to help keep the photos straight; this reduces the chances that you'll need to straighten the digital image. These measures cost almost no time and just a few dollars. However, they will do much more for the quality of your scans than a fancy scanner.
Although I believe that prints don't have information beyond 300dpi, I nevertheless scan at 600dpi. This is partly as a margin of safety and partly because I like to capture a little of the texture of the print.
If you have access to the negatives for the prints then it is much better from a quality point of view to scan from them. Slides and negatives are much more fiddly to scan but they are less prone to deterioration than prints and the results can be quite striking. See for example these pictures of my late mother-in-law taken in the 1960s and scanned from slides:


Of course, you will need to use a much higher scanning DPI for negatives and slides. I suggest you experiment with resolutions of around 3000dpi. In any case, you probably want to aim for images in the 5-20 megapixel range. Smaller and you are throwing away information unnecessarily. Larger and scanning takes more time and the files become unwieldy for little benefit.
Finally, when reading about scanning on the Internet you may learn that some consider TIFF files to better than JPEG. There is technical merit to this idea but for consumers the extra work needed to handle this format outweighs the benefits. If you scan your prints at 300dpi, your slides and negatives at 2000dpi and save the results as JPEGs then you won't go far wrong.
Scanning Your Entire Life is not an all-or-nothing undertaking. Every scan, every label and every touch-up adds a little more to your collection. Completing the project may seem a distant goal. However, as you scan and label you would do well to remember the ancient Chinese proverb:
“If you want to make a journey of a thousand miles, you begin by taking the first step. One step leads to the next, and soon the beauty of the countryside makes you forget the toil of the road.”

Thanks for providing your information. Your statement about CrashPlan makes it sound like they are going out of business. CrashPlan is only discontinuing their CrashPlan for Home service. The other CrashPlan services remain. They are encouraging their users to switch to the CrashPlan for Small Business service.
Yes, yes, yes! The random slideshow on the screen that lives in our kitchen is the best! We linger after dinner. The grandkids are learning about family they didn’t get to meet. The kids gather in the kitchen and pause as unexpected memories bring comments and laughter. Digital photos taken, photos captured from social media, scanned photos and old slides… they all make their way to our kitchen, where everyone gathers. The organizing is for archiving, but the random slideshow is the pleasure and the payoff!
Thanks for sharing this. Not sure you did “scan” your entire life – what you did was organise after someone else had scanned. Probably a good idea (unfortunately, too expensive for me) as I find the physical process of putting slides/negatives/photos into the scanner to be a really time-consuming chore.
Thanks again for sharing and I agree completely that the real reason for doing this is to enjoy the photos and memories.
Congratulations on completing your scanning project. Thanks for sharing your experience and advice.